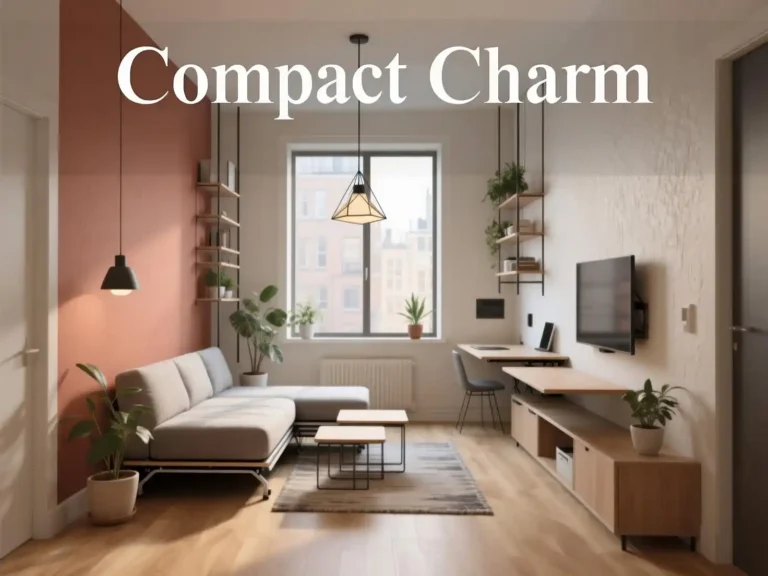
Designing a nursery is about more than choosing cute wall colors and furniture — it’s about creating a functional, safe, and calming space where both baby and parents can thrive. A thoughtful nursery layout considers traffic flow, safety (crib away from windows and cords), and zones for sleeping, changing, feeding, and playing. Like a meadow where every path leads somewhere useful, a well-planned nursery makes midnight feedings easier, diaper changes smoother, and playtime more joyful. You’ll discover that the right layout can make a small room feel spacious and a large room feel cozy.
These nursery layout ideas will help you arrange furniture for maximum function and beauty. From crib placement (never under a window or near blinds) to rocking chair positioning (near an outlet and a small table), from dresser placement (within arm’s reach of the changing pad) to toy storage (low and accessible), you’ll learn to create a room that works for your family. Like a meadow designed with intention, your nursery will be a sanctuary for both baby and you.
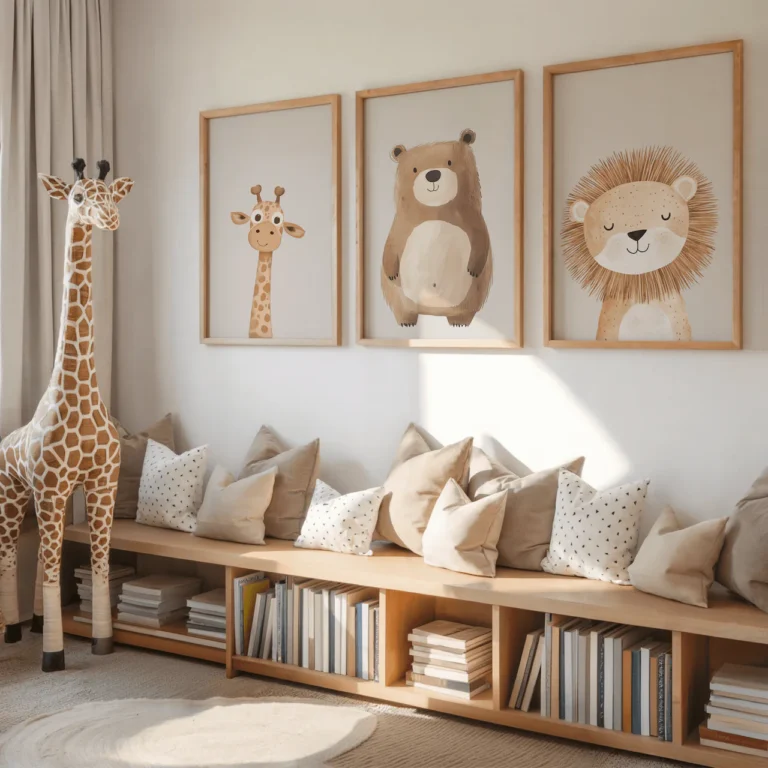
1. Green Walls & Picture Wall: A Calming Focal Point
Place the crib on the main wall, with a gallery of pictures above it, and paint the walls a soft sage green. This serene nursery layout creates a calm focal point. You’ll love how the green soothes both baby and parent, and how the pictures add personality without clutter, like a gentle meadow framed in art.
In this nursery layout, the crib is the star. Center it on the longest wall. Keep the wall above the crib simple — lightweight frames securely anchored, or a decal. The green walls (sage, mint, or eucalyptus) are calming and gender-neutral. The layout is simple, safe, and serene.
2. Neutral Nursery: Cream, Beige & Wood Tones
Design a neutral nursery with cream walls, beige curtains, and natural wood furniture — crib, dresser, and rocking chair. This timeless nursery layout is calm and versatile. You’ll appreciate how the neutral palette grows with the child, and how the wood adds warmth, like a sunlit meadow.
A neutral nursery layout is perfect for parents who want a calm, non-stimulating environment. Use cream or beige on walls. Choose wood furniture in oak, walnut, or birch. Add softness with a beige or cream rug. The room will feel warm, peaceful, and will easily transition to a big-kid room.
3. Plants & Play Mat: A Floor-Level Nursery Zone
Create a floor-level play zone with a soft rug, a few baskets of toys, and a child-safe plant in a corner. This developmentally friendly nursery layout encourages tummy time and exploration. You’ll love how the play mat invites baby to move, and how the plants add life, like a meadow floor.
In a nursery layout, the floor is prime real estate. Leave open space for tummy time, crawling, and play. Add a soft rug or foam mats. Place low shelves or baskets for toys within baby’s reach (when older). A child-safe plant (spider plant, Boston fern) adds a touch of nature at floor level.
4. Crib & Dresser on Opposite Walls: Efficient Flow
Place the crib on one wall and the dresser (with changing pad) on the opposite wall, creating an efficient workflow. This classic nursery layout keeps the changing station accessible from the crib. You’ll appreciate how you can move from changing to crib without crossing the room, like a path through a meadow.
In a nursery layout, the changing station should be close to where you’ll be. Placing the crib and dresser on opposite walls works well in rectangular rooms. Keep a diaper pail near the changing station. Ensure there’s a clear path between the two. The layout is efficient and safe.
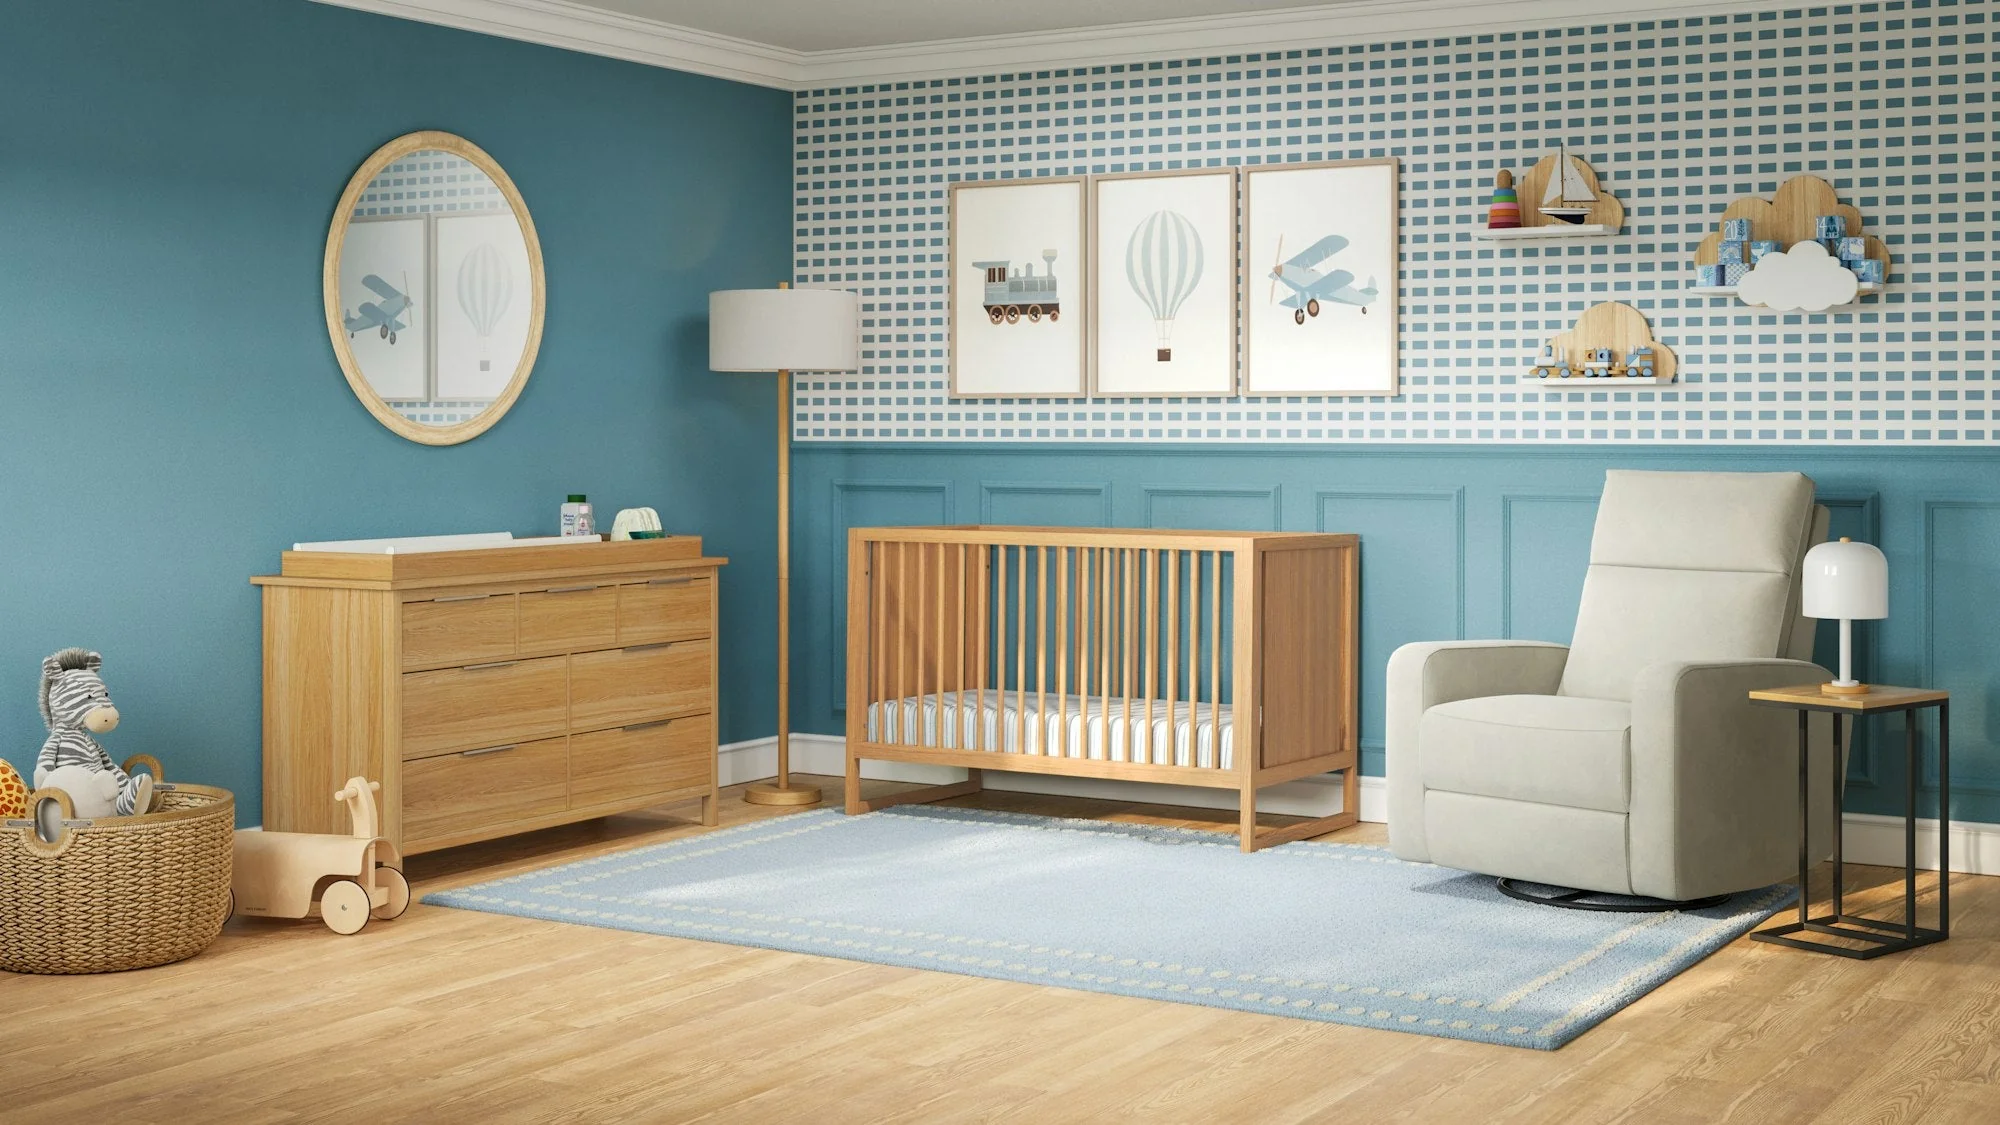
5. The Golden Triangle: Crib, Rocking Chair & Dresser
Arrange the crib, rocking chair, and dresser in a triangle formation, creating a functional flow between sleeping, feeding, and changing. This smart nursery layout minimizes steps during late-night changes. You’ll love how the triangle keeps everything within reach, like three stones in a meadow.
The golden triangle is a classic nursery layout principle. Place the crib, rocking chair, and changing dresser so you can move easily between them. Keep a small table next to the rocking chair for water, snacks, and burp cloths. The layout saves your energy during those long nights.
6. White Rug Under the Crib: Soft & Bright
Place a soft white rug under the crib, extending out toward the rocking chair, creating a cozy zone. This inviting nursery layout adds warmth and defines the sleeping area. You’ll love how the rug softens the floor, and how the white brightens the room, like fresh snow in a meadow.
A rug under the crib is a lovely nursery layout detail. It defines the sleeping zone and provides a soft surface for middle-of-the-night wake-ups. Choose a washable rug — white may seem impractical, but it can be bleached and cleaned. The rug adds warmth and comfort.
7. Nursery in a Shared Room: Corner Crib & Dresser
Create a nursery corner in a shared room by placing the crib in one corner, the dresser in another, and using a room divider or curtain. This space-saving nursery layout is perfect for apartments. You’ll love how the corner feels like its own room, and how the curtain creates privacy, like a hidden meadow.
Not all nurseries have their own room. In a shared nursery layout, use a corner for the crib. Place the dresser nearby. Add a curtain or a folding screen to create visual separation. The baby has their own zone, and the rest of the room remains for other uses.
8. Corner Crib with Shelves: Using Every Inch
Place the crib in a corner, with floating shelves above for books and baskets, and a small rocking chair angled nearby. This efficient nursery layout maximizes a small room. You’ll love how the corner feels cozy, and how the shelves use vertical space, like a nook in a meadow.
A corner crib is a great nursery layout for small rooms. It tucks the crib out of the main traffic flow. Place shelves above the crib (high enough that baby can’t reach) for books and decor. Angle the rocking chair toward the crib. The layout feels cozy and contained.
9. All-White Nursery: Clean & Simple
Choose white furniture — white crib, white dresser, white rocking chair — against white walls. This minimalist nursery layout is calm and timeless. You’ll appreciate how the white makes the room feel larger, and how the simplicity reduces visual clutter, like a fresh canvas in a meadow.
An all-white nursery layout is serene and modern. The white furniture blends into the white walls, making the room feel larger. Add texture with a rug, curtains, and a chunky knit blanket. The white palette can be accented with any color — add a few colorful pillows or toys.
10. Neutral with Beige Curtains & Wood Accents
Combine neutral walls (beige or cream) with beige curtains and natural wood furniture. This warm nursery layout is cozy and calm. You’ll love how the beige adds warmth without color, and how the wood adds texture, like a sun-warmed meadow.
Beige and cream are wonderful nursery layout neutrals. They are warm and soothing. Use beige on walls, curtains, and the rug. Choose wood furniture in oak or walnut. The room will feel like a hug — warm, soft, and deeply restful.
11. Twin Nursery: Two Cribs, One Dresser
Arrange two cribs on opposite walls or side by side, with a single dresser between them or on a third wall. This efficient nursery layout for twins maximizes space. You’ll love how the symmetrical arrangement feels balanced, and how the dresser serves both babies, like a shared meadow for two.
For twins, a nursery layout needs two cribs. Place them on opposite walls or side by side. Use one large dresser for both. Keep a rocking chair in the corner. The room will be tight, but the layout can work. Use vertical space for storage.
12. Rocking Chair by the Window: Natural Light for Feedings
Position the rocking chair near a window so you can enjoy natural light during daytime feedings. This thoughtful nursery layout makes feeding more pleasant. You’ll love how the sunlight warms you, and how the view gives you something to look at, like a meadow outside the window.
The rocking chair placement is important in nursery layout. Place it near a window for natural light. Also ensure it’s near an outlet for a phone charger or white noise machine. Keep a small table beside it for water, snacks, and burp cloths. The chair should face the crib so you can see baby.
13. Changing Table Next to Dresser: A Dedicated Station
Place the changing table next to the dresser, creating a dedicated changing station with storage for diapers and wipes within reach. This efficient nursery layout keeps everything you need in one spot. You’ll appreciate how the station saves steps, and how the organization reduces stress, like a well-stocked meadow kitchen.
In a nursery layout, the changing station should have everything within arm’s reach: diapers, wipes, diaper cream, and a changing pad. Place the changing table next to the dresser where you store extra supplies. Keep a small trash can or diaper pail nearby. The station should be efficient and safe.
14. Crib Opposite the Window: Safe & Bright
Place the crib on the wall opposite the window, not directly under it, to avoid drafts and cords. This safe nursery layout is recommended by pediatricians. You’ll love how the crib gets natural light without the risks, and how the room feels bright and airy, like a sunlit meadow.
Safety first in nursery layout: never place the crib under a window (risk of falls, drafts, and blind cords). Also keep crib away from curtains, blinds, and cords. Place the crib on a solid interior wall. The wall opposite the window is often ideal — it gets indirect light but no direct sun on baby.
15. Neutral with Soft Pink Accents: Gentle Color
Add soft pink accents (pillows, a rug, a blanket) to a neutral nursery for a gentle pop of color. This versatile nursery layout can easily be changed. You’ll love how the pink warms the room, and how the neutral base makes future changes easy, like a meadow dotted with flowers.
Neutral walls and furniture with soft pink accents is a lovely nursery layout. Use pink in a rug, pillows, curtains, or art. The pink adds warmth without being overwhelming. When the baby grows, you can swap pink for another color. The neutral base remains, saving you from repainting.
16. Crib on Interior Wall, Dresser on Same Wall
Place both the crib and the dresser on the same interior wall, leaving the opposite wall free for a rocking chair and play area. This efficient nursery layout works well in narrow rooms. You’ll love how the furniture lines up, and how the open space feels like a clearing, like a path through a meadow.
In a narrow room, a nursery layout with furniture on one wall works well. Place the crib and dresser side by side on the longest interior wall. Leave the opposite wall free for a rocking chair and a small bookshelf. The room will feel less cramped, and the open floor space is safe for play.
17. Crib Centered, Rocker Angled, Dresser to the Side
Center the crib on the main wall, angle the rocking chair toward it, and place the dresser on a side wall. This dynamic nursery layout feels balanced and intentional. You’ll love how the angled chair invites you to sit, and how the centered crib becomes the focal point, like a throne in a meadow.
Centering the crib is a classic nursery layout choice. It makes the crib the star of the room. Angle the rocking chair toward the crib so you can see baby while feeding. Place the dresser on a side wall, not next to the crib (safety first). The layout is balanced and beautiful.
18. Soft Pink Nursery: Blush Walls & White Furniture
Paint the walls a soft blush pink and use white furniture — white crib, white dresser, white rocking chair. This dreamy nursery layout is romantic and calm. You’ll love how the pink warms the room, and how the white keeps it bright, like a cherry blossom meadow.
Blush pink is a popular nursery layout color. It’s soft, warm, and feminine without being overwhelming. Pair with white furniture and natural wood accents. The pink will feel cozy and calm. Add a few gold accents for a touch of elegance.
19. Pink Walls, White Furniture & Floral Accents
Combine soft pink walls, white furniture, and a floral rug or curtains for a classic, feminine nursery. This charming nursery layout is both sweet and sophisticated. You’ll love how the floral adds pattern, and how the pink and white keep it fresh, like a cottage garden meadow.
A pink and white nursery layout with floral accents is timeless. Use a floral rug, floral curtains, or floral art. The pink walls provide a soft backdrop; the white furniture keeps it clean. The floral pattern adds interest without being overwhelming.
20. Pink Clouds: A Painted Ceiling Accent
Paint soft pink clouds on a white ceiling above the crib, creating a dreamy focal point. This creative nursery layout turns the ceiling into art. You’ll love how the clouds seem to float above baby, and how the pink ties the room together, like a sky over a meadow.
A painted ceiling is a wonderful nursery layout feature. Use a stencil or freehand clouds in soft pink on a white ceiling. The clouds will be visible from the crib, giving baby something interesting to look at. The ceiling becomes a focal point without taking up floor space.
21. Corner Crib with Wall Shelves: Maximizing Space
Tuck the crib into a corner and install floating shelves above (high enough that baby can’t reach) for books and small baskets. This space-saving nursery layout is ideal for tiny rooms. You’ll love how the corner feels cozy, and how the shelves use wasted vertical space, like a nest in a meadow.
A corner crib is a great nursery layout for small spaces. It tucks the crib out of the main traffic flow. Install shelves above the crib (at least 12 inches above the crib rail) for storage. Use the shelves for books, small baskets, or decor. The corner becomes a cozy, functional nook.
22. Simple Layout: Crib, Chair & Dresser in a Row
Place the crib, rocking chair, and dresser along the same wall in a row, leaving the opposite wall free for play. This linear nursery layout works well in long, narrow rooms. You’ll love how the furniture lines up neatly, and how the open space feels like a path, like a meadow aisle.
In a long, narrow room, a linear nursery layout is efficient. Place the crib, rocking chair, and dresser along one wall. Leave the opposite wall completely free for play and movement. The room will feel open and spacious. Use a rug to define the different zones.
23. Cloud & Hot Air Balloon Theme: A Whimsical Layout
Design a whimsical nursery with cloud decals on the ceiling, hot air balloon decals on the wall, and a neutral crib. This playful nursery layout is full of imagination. You’ll love how the theme inspires wonder, and how the decals are removable when baby grows, like a storybook meadow.
A themed nursery layout can be magical. Use removable decals for clouds, hot air balloons, or animals. Keep the furniture neutral so the theme can be easily changed. The decals are temporary, so you can update the room as your child grows. The theme adds joy without permanent commitment.
24. Cottagecore Nursery: Floral, Vintage & Cozy
Create a cottagecore nursery with floral wallpaper, vintage wooden furniture, soft linens, and plenty of baskets. This cozy nursery layout feels like a country cottage. You’ll love how the flowers add color, and how the vintage pieces add character, like a meadow cottage.
Cottagecore is a lovely nursery layout style. Use floral wallpaper or floral curtains. Choose vintage or vintage-style wood furniture. Add baskets, linen, and dried flowers. The room will feel cozy, nostalgic, and deeply charming. It’s a nursery that feels like a storybook.
25. Organized & Light: A Minimalist Nursery Layout
Keep your nursery layout minimal and organized with white walls, white furniture, and a few well-chosen accessories. This light nursery layout feels spacious and calm. You’ll appreciate how the empty space reduces stress, and how the organization makes everything easy to find, like a tidy meadow.
Minimalist nursery layout is about less clutter, not less love. Use white walls and white furniture. Keep toys and books in closed storage (baskets, bins). Leave surfaces mostly clear. The room will feel calm, spacious, and easier to clean. You’ll have more energy for the baby, not for tidying.
26. White Walls, Wood Floors & a Pop of Color
Use white walls and natural wood floors as a neutral base, then add a pop of color (blue, green, or pink) in the rug, curtains, or art. This versatile nursery layout is easy to update. You’ll love how the white and wood make the room feel bright, and how the pop of color adds personality, like a wildflower in a meadow.
White walls and wood floors are a classic nursery layout foundation. They are bright, warm, and versatile. Add color through accessories — a blue rug, green curtains, pink art. When your child’s tastes change, you can swap the accessories without repainting. The base remains, saving you time and money.
🍼 Crib & Changing Station Blueprint: 5 Essential Rules for Nursery Layout
- 🛏️ Crib Safety First: The most important nursery layout rule is crib safety. Never place the crib under a window (risk of falls, drafts, and blind cords). Keep the crib away from curtains, blinds, and electrical cords. The crib should be at least 12 inches away from any other furniture. The mattress should be firm and fitted. No bumpers, pillows, or stuffed animals in the crib. Safety is non-negotiable.
- 🪑 The Golden Triangle: The most efficient nursery layout places the crib, rocking chair, and changing station in a triangle formation. This minimizes steps during late-night changes and feedings. Keep a small table next to the rocking chair for water, snacks, and burp cloths. Keep diapers and wipes within arm’s reach of the changing station. The triangle saves your sanity and your feet.
- 🧺 Zone Your Space: A good nursery layout has distinct zones: sleeping (crib), changing (dresser with changing pad), feeding (rocking chair), and playing (open floor area). Define each zone with a rug or furniture placement. The zones help you stay organized and make the room feel larger. Your baby will also begin to associate each zone with its activity.
- 📦 Use Vertical Space: In a small nursery, the walls are your friend. Install floating shelves above the dresser or changing table for extra storage. Use wall hooks for bags or robes. Hang a bookshelf high (out of baby’s reach) for books you’ll read to them. Vertical storage keeps the floor clear for play and movement. A well-used wall is a game-changer in a small nursery.
- 🪞 Keep a Clear Path: In your nursery layout, leave a clear path from the door to the crib, from the crib to the changing station, and from the changing station to the rocking chair. You’ll be walking these paths in the dark, half-asleep. No furniture should block these paths. A clear path is a safe path, and safety is the most important consideration in a nursery.
Frequently Asked Questions
Q: Where should the crib be placed in a nursery?
Ans: In a nursery layout, the crib should be placed on an interior wall, away from windows, doors, and drafts. Never place the crib under a window (risk of falls, drafts, and blind cords). Keep the crib away from curtains, blinds, and electrical cords. The crib should not be near a radiator or heat vent. The ideal placement is on the wall opposite the door, so you can see baby when you enter.
Q: How much space should be between furniture in a nursery?
Ans: In a nursery layout, leave at least 24 inches of walking space between large furniture pieces (crib to dresser, dresser to chair). This allows easy movement, especially at night. Leave at least 12 inches between the crib and the wall (for air circulation and safety). The changing station should have enough room to stand comfortably (about 24 inches). A cramped nursery is difficult to use; a spacious one is a joy.
Q: Can I put the crib in a corner?
Ans: Yes — a corner nursery layout can work well, especially in small rooms. Place the crib with two sides against the walls (corner). Ensure the walls are solid interior walls (not exterior walls that may be drafty). Keep the crib at least 12 inches from any windows. The corner placement can make the room feel larger and create a cozy sleeping nook for baby.
Q: How do I arrange a nursery in a very small room?
Ans: For a very small nursery layout, use a mini crib (smaller than a standard crib). Use a wall-mounted changing table (folds up when not in use). Use floating shelves instead of a bookshelf. Place the crib in a corner. Use a small glider instead of a full-size rocking chair. Use vertical storage. Keep the room minimal — too much furniture makes a small room feel smaller. Every piece must earn its place.
Q: What should I put next to the rocking chair in a nursery?
Ans: In a nursery layout, place a small side table next to the rocking chair. Keep a water bottle, snacks, burp cloths, a phone charger, and a book within reach. A small basket on the floor can hold extra blankets. A floor lamp next to the chair provides soft light for nighttime feedings. The area next to the rocking chair is your command center — make it comfortable and functional.
Conclusion
You have journeyed through the thoughtful world of nursery layout — from crib placement and rocking chair angles to changing stations and play zones. Each image whispered the same truth: a nursery is not just a room; it is a system. Like a meadow where every path leads somewhere useful, a well-designed nursery makes the hard work of parenting just a little bit easier. The right layout saves steps, reduces stress, and keeps baby safe. It turns a room into a sanctuary — for baby, and for the parents who will spend countless hours there.
Now it is your turn to measure your room, sketch your floor plan, and move the furniture. Your nursery layout journey begins with a tape measure and a piece of paper. The room is waiting to become safe, functional, and beautiful — a place where your baby will sleep, play, and grow. 🍼🌿🛏️